| The Slitting Method for Residual Stress Measurement: : Shot peening |
Shot peening residual stresses in Ti-6Al-4V
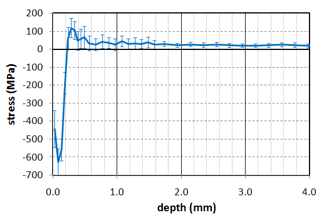
RESULTS: Stress profile
|
 |
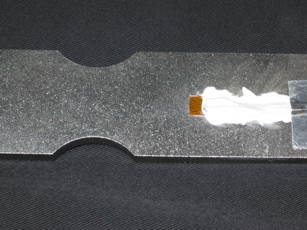
Titanium specimen:
|
 |
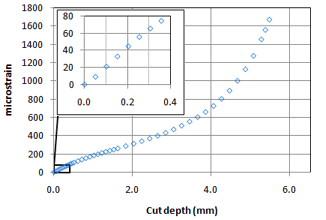
Cut slot using wire EDM:
|
 |
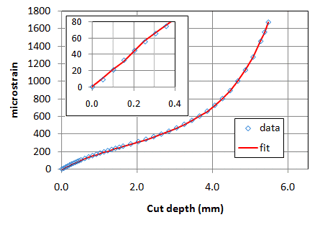
Used "pulse method" to fit data:
|
 |
Options and advice for measuring shot peening and other near-surface stress profiles
Option 1: use gage on top surface very near the cut.
- See: W. Cheng et al., "The Compliance Method for Measurement of Near Surface Residual Stresses - Application and Validation for Surface Treatment by Laser and Shot-Peening, " J. Eng. Mat. & Tech., 116, 556-560, 1994. Shot peening in Ti-6Al-4V just like these stresses
- Advantage: top gauge can be very sensitive to near surface stresses
- Disadvantages: top gauge is experimentally harder to achieve (cutting very close and using small gauge), and very sensitive to cutting induced stresses and other errors
Option 2: use back gauge like the experiment on this page
- Advantage: easier experimentally and much more robust to errors
- Disadvantage: less sensitive, however ...
- To improve sensitivity, use a thinner part. Use inherent strain or eigenstrain approach to transfer slitting results from test coupon to structure.
The back gauge measurements on this page could be improved
- Since strains and strain increments are large enough, could use smaller increments to get better resolution
- Smaller wire diameter would also help